Portable Wire Rope Tester
1. System Brief Introduction
TCK.W Portable wire rope tester
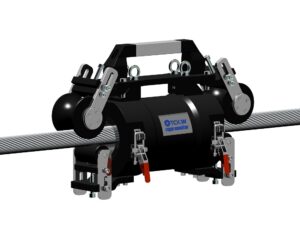
Significant innovation in science inevitably caused significant breakthrough in technology. The weight of portable wire rope tester is less than 2 kgs, it is 1/6-1/25 of traditional testing equipment. The highest sensitivity of TCK sensor can reach 5v/mT, is beyond 700 times than traditional sensor’s sensitivity. The gap between sensors and rope are 10-30 mm, non-contact wide width inspection is realized, which is not affected by oil sludge, warped wires and rope speed. The device has a high pass capability, unique self open-lock function, ensuring safe testing operation. Humanized interfacial design makes testing operation very convenient. Instant random viewing inspection data, curve, analysis report and digital inspection result can be viewed as soon as inspection is finished. Connecting portable wire rope tester with computer the formal test reported can be printed. It provides users with scientific basis of safe wire rope operation and reasonable wire rope replacement.
Global leading inspection technology
Portable wire rope tester can evaluate correctly residual bearing capacity and service life of tested wire rope by inspecting quantitatively percentage loss of metal effective bearing cross-section area caused by internal and external flaws of rope such as broken wires, abrasion, corrosion, fatigue etc, and providing users with scientific basis of safe wire rope operation and reasonable wire rope replacement which conforms to related standard and code. It is a high-tech safeguard which can prevent from wire rope failure, decrease reasonably cost of wire rope and improve operating efficiency.
Three Innovations & Two Breakthroughs
Weak magnetic inspection technology is an important innovative achievement in the field of wire rope inspection, based on successful discovery made by our country’ scientist on the changes and movement rules of Space Magnetic Field Vector Status. This leading weak magnetic flaws detection technology focuses on 3 innovations and 2 breakthroughs.
Three Innovations
1. Establish new theory of “Spatial Magnetic Field Vector Resultant”
2. Discover new method of “Weak Magnetism Inspection”.
3. Invent the new technology of “Dou’s Element/sensor”.
Two Breakthroughs
1. Quantitative detection on various wire rope flaws.
2. Accurately evaluate the residual bearing capacity, safety coefficient and in-service life of the wire rope.
The first-rate enterprise set up standard
Our company takes an active part in drafting China’s Coal Industry Professional Standard (MT/T970-2005): Non destructive and fix quantity detecting method and determinant rule for tight wire on-line, which was issued by the National Development and Reform Commission of China. This is not only China’s first wire rope inspection standard, but also the world’s first standard with assessment rules. The base of this standard is W® weak magnetic inspection technology; therefore,the technical grade of it is much higher than wire rope inspection standard issued by countries such as USA and Europe. The standard’s publication marked that the Chinese wire rope inspection technology is at leading level in the world.
2. Function & Features
The system functions of portable wire rope tester
1. instrument can detect quantitatively all kinds of internal and external wire rope flaws such as broken wires, abrasion, corrosion, fatigue, deformation, evaluating residual bearing capacity, safety coefficient and service of tested wire rope.
2 The instrument can send out alarm sounds during test if flaws found.
3. The instrument can calibrate online, ensuring the real and correct inspection results.
4. The instrument has function of fault self-diagnose, ensuring reliable operation.
5. The instrument is designed by integration design, no electrical cable connection while operation.
6. The gap between the internal shell and surface of wire rope is 20-30mm.The relative movement design mode between the guide wheels and wire rope tested is adopted. The pass capacity of rope is not affected generally by deformation of rope, oil sludge, dirt, warped wires etc. It is applicable to inspections under all kinds of severe operation environment.
7. The gap between the internal shell and surface of wire rope is 20-30mm.The relative movement design mode between the guide wheels and wire rope tested is adopted. The pass capacity of rope is not affected generally by deformation of rope, oil sludge, dirt, warped wires etc. It is applicable to inspections under all kinds of severe operation environment.
8. A concise keyboard layout design is adopted in this instrument, with a linear logic rolling interface switch, indicative man-machine dialog, intelligent built-in software operation, easy and convenient to operate.
9. Instant random viewing inspection data, curve, analysis report and digital inspection result can be viewed as soon as inspection is finished. Connecting portable wire rope tester with computer, a formal test reported can be printed
10. The instrument is equipped with high-performance Lithium-polymer batter which conforms to national standard and can be recharged random and circularly.
11. The high strength, anti-corrosion organic insulation engineering material are applied to body of instrument, ensuring instrument not damaged by accidental injury such as electric leakage, short circuit, outdoor thunder strike etc under all kinds of operation environment.
12. The instrument has passed CE certification of EMC, no electromagnetic pollution to environment and no interference with operation of nearby electronic and communication equipment.
13. The instrument has functions of water-proof, dust-proof, and oil-proof, damp-proof.
Features of portable wire rope tester
1.High inspection precision, high resolution, accurate test result
“Weak magnetism sensor” technology: uniquely created by the scientists in our company, its sensitivity is 700 times higher than traditional tester. The sensor has strong resolution, and can inspect quantitatively actual wire rope flaws under various working status.
2. Reliable performance
Quantitative uncertainty for measuring the percentage loss of effective bearing metallic cross-sectional area (LMA) and other flaws such as broken wires, corrosion and abrasion (LF) : ±1%.
3. High Level Integration
All function modules are integrated, including system self-diagnosis module, digital automatic calibration module, “Eagle Eye” module, S/N quality module, signal fidelity module, and anti-interference module
4.Fast data processing capability
By analyzing the original data extracted by TCK•W® testers from the wire rope, TCK•W® patented software is capable of evaluating the working condition of the rope in use. It will not only display the testing result and print out the test report in real time, but also exchange data between the tester and a PC at fast speed;
5. Small volume and light weight
The weight of TCK•W® portable flaw detector is less than 2kg, which is only 1/6—1/20 of that of similar products at home and abroad;
6.Wide applicability
Applicable to wire rope inspections under complex working conditions and not be affected by the inspectors’ experience or skills, rope speed, noise, water spraying, warped wires, oil dirt and other factors;
7.Accurate inspection results
Capable of quantitatively measuring the percentage loss of effective bearing metallic cross-sectional area (LMA), caused by internal and/or external broken wires, abrasion, corrosion, fatigue and other defects and thereby evaluate the residual bearing capacity and service life of the inspected wire rope.
3. Technical Performance & Parameters
Technical Parameter
1.Sensor working sensitivity:≥1.5V/mT
2.System error for MRT : ±1%
3.Flaws positioning accuracy: ≥98
4.Maximum inspection speed: 20 m / s
5.Safe speed for handheld inspection: ≤2m/s
6.Wide space inspection: No contact between rope rope and tester cavity during inspection
7.Sensor working field intensity: < 20mT
8.Working voltage: DC 5V
9.Sensor working environment:Temperature: -20℃~55℃; Humidity: ≤95%RH
10.Data retrieval and result query upon inspection completion
11.Weight: ≤3KG
12.Ingress protection: IP57
Inspection Accuracy
Over Limit Flaw Detecting Accuracy: 100% (Loss of Effective Metallic Area over 10%)
Server Flaw Detecting Accuracy: 100% (Loss of Effective Metallic Area between 8% and 10%)
Server Flaw Detecting Accuracy: 100% (Loss of Effective Metallic Area between 8% and 10%)
Medium Flaw Detecting Accuracy: >98% (Loss of Effective Metallic Area between 4% and 6%, still within safety range)
Minor Flaw Detecting Accuracy: > 90% (Does not affect safe use, Loss of Effective Metallic Area between 2% to 4%)
Slight Flaw Detecting Accuracy > 75% (Value less than 2%, could be disproportion of wire rope, internal welding spot, and padding metals)
Wire Rope Flaws Quantitative Inspection System Analysis Software
1. TCK.W-BX Wire Rope Flaws Quantitative Inspection (Lower computer) built-in professional software inside the wire rope tester, assist to realize the calibration of test benchmark, real-time signal collection, data storage, pretreatment, info retrieval, memory management and instrument self-checking during wire rope online inspection.
2. TCK.W-BX wire rope flaws quantitative inspection software analysis software
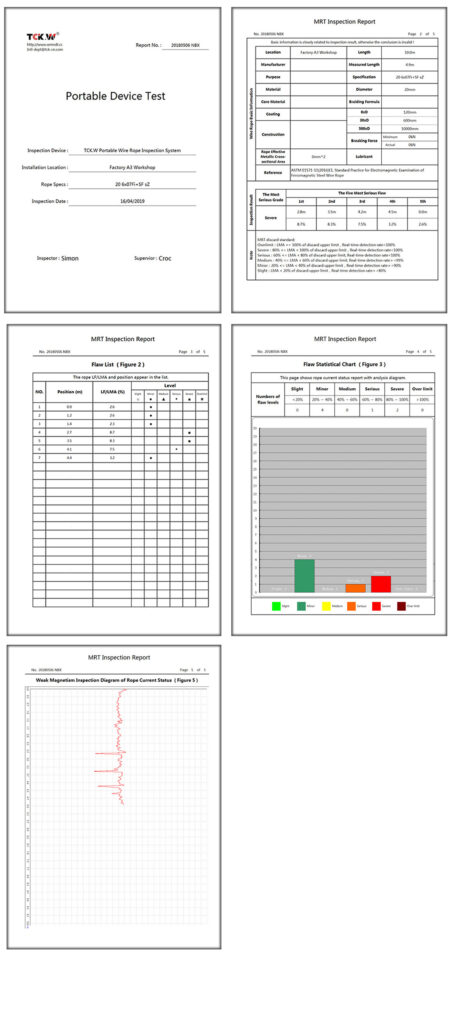
Used for handle of testing data, assist to realize data transferring, curve analysis, tabulation management, display & print, storage & filing. Computer terminal: Fig(2), Fig.(3)
4. Test Report
Manual analysis for each wire rope inspection made by portable wire rope tester is not necessary; only need connecting with PC and printer, can a test report with analysis result be printed any time.


